Another week of printmaking, and I was able to be a bit more productive this time around! As I have been digging deeper into printmaking, there are a handful of methods I’ve been eager to try out. This week, I focused entirely on repeatable patterns.
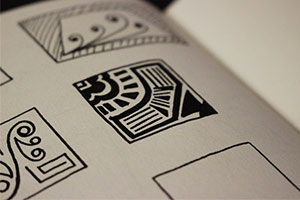
The original sketch for this week’s stamp.
Because the options are endless!
I was so overwhelmed by which direction I could take in this study, so I started where I always do. Pinterest! I collected photos for inspiration until I began to have a better idea of what I wanted to carve. It was so helpful to take the time to brainstorm a bit before diving in, which is another reason I’m thankful I get a whole month of digging deeper with printmaking. Then I could begin carving my stamp confidently because…
Ctrl + Z is not a thing in printmaking.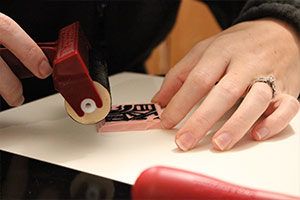
I have favored digital design over studio art for as long as I can remember. The ability to take a second chance if I didn’t like that last mark is just so appealing to me. Although I admire dearly the ability to create so freely, I’ve never been the most confident in creating things that aren’t easily undone.
Perhaps this is a nod toward the creative standard I often set too high for myself; a standard that usually leaves me more intimidated than encouraged to try; a standard that slows me way down to the point of me not creating anything. Pressure gets put on myself that the first time around has to be the best I could ever do, and that I have to be proud of it.
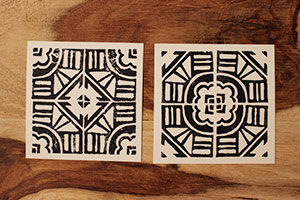
I polled my Instagram audience to see which of these is their favorite! (Made from the same stamp.)
Be proud of the effort, not just the outcome.
This creative standard is definitely something from which I’m trying to break free. The truth is, each time I create something, it is the best I could ever do at that given time. Creating is a growing process! The Heartward Project would not be needed if I was a master at things right away. Many very talented printmakers spent hours digging deeper into printmaking and that is why they are so great at what they do! And I’m sure they’ve created stamps they didn’t like along the way. But they learned from it, continued forward, and are where they are today because of it.
This is not my last stamp.
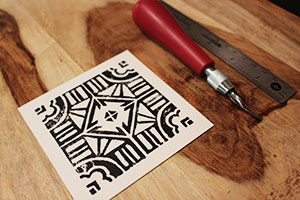
The favorite, as voted for on Instagram.
I started sketching for this week’s stamp right away. Of course, I wasn’t that happy with my sketches, and before I knew it, I had started drawing on the carving block. Exhibit A of me rushing the creative process! (Thankfully, this time around I really enjoyed the end result, but that is not always the case!) The sketch on the carving block varied from the sketch on paper. And then the sketch changed again while I actually carved it out. The changes made me a bit nervous, but I really loved the outcome.
During the carving stage, the stamp design became more simplified, and I think it was for the better. The design is roughly a 1.5 inch x 1.5 inch square, and I’m still fairly sloppy with the carving tool–exhibit B of rushing the process–so less detail at this point is probably best.
Embrace the mistakes!
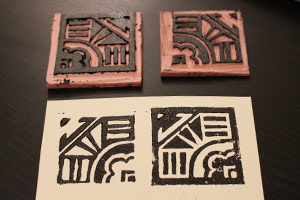
Direct comparison of stamps and their prints.
Not only did the design change twice after the original sketch, I also accidentally inversed the pattern. The very first cut into the carving block that I made, I cut out the wrong section. Seriously. Still in Printmaking 101! For me this mistake was easy to recover from, especially that it was made right away, because the entire stamp just becomes an inverse of its intended pattern.
I found this mistake to actually be a fun opportunity to create a second stamp with my orginally-intended design, and see how the two compared side by side! I actually found my first stamp, the one created as a result of my carving mistake, to be the best repeatable pattern! You cannot fail! There wasn’t a solid border, making it easier to repeat over and over again. The second stamp, my original design, is quite bold, and I think it stands very well on its own with the square outline. The outline challenged me when trying to line up my repeated pattern for each print, as you may notice in the images!
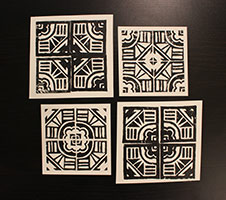 Definitely still learning.
Below are a couple of challenges that I’m still trying to figure out as I dig deeper into printmaking:
- One of the biggest challenges I faced this week with these stamps is the actual printing process. I couldn’t (and still can’t) figure out how to make my ink not seem goopy. It gets applied too thick and then makes the stamp slide around the paper, resulting in a smeared print.
- I reached out to a talented printmaker on Instagram and she stated that sometimes the temperature of the room affects the ink. (Pretty sure she’s from California and is unaware of the -17 degree temps outside tonight!) She did say I could use “ink extender” to help with this issue; I have something called “Silkscreen Medium” from my screen printing class (same ink type) a few years back. I don’t think it’s quite the same thing but I gave it a try anyway! Still haven’t figured it out…
- I also haven’t figured out a great method for printing yet. I’ve seen so many videos where a spoon is used, or a tool that looks like an air hockey paddle to apply the print evenly. Sometimes the stamp is on top of the paper, sometimes the paper is on top of the stamp. For repeated patterns with a small stamp, it was easiest to lay the paper flat and place my stamp where I desired. The alternate method didn’t make sense for repeating patterns, but I’ll have to give it a try with my next stamp!
The key with the printing process is to slow down.
I’m learning that I really need to just trust the process and allow for my creativity to develop throughout the life of the project, and not just the final phase. Most often this will happen slower than what I hope for! But good things will come from it; it always works out that way.
Share with me below how well your first month’s challenge is going!
Related: Exploring the Art of Printmaking; The Heartward Project Kickoff; 2017: My Most Creative Year Yet
