You know when it’s the night before your Christmas celebration, and you’re avoiding your gift wrapping by getting lost in the social media world, and every perfectly wrapped gift that comes across your feed almost feels like a slap in the face? You start to wonder, who could possibly (A) have their gifts already wrapped, and (B) have the time to make them look like they’re out of a magazine?
The answer? YOU!
I’m serious! Particularly if every ounce of your being wants to stop reading because you think this could not possibly work for you. Good news: it totally can! This post is the first of three that are written in a way that makes those picture perfect gifts possible without spending a fortune!
First, gift tags.
I know, I know. Take it slow, Taryn. Gift tags are probably not high on many’s list of things that make a gift cute. BUT. When you start small, dip your toes first, you water that creative seed inside of you, and it grows! Let’s first get comfortable with a simple start, a warm up you could call it.
Method A: Cut-outs
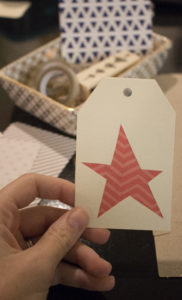
I have some scrapbook paper that is really cute but maybe not all that seasonal.  However, with today’s trends, just about any pattern applied tastefully can find its way under the tree. I wanted to make use of mine but didn’t want it to be overload, which is how this cut-out tag came to be! Make sure you add a back to this tag to secure the nested paper and complete the look.
Additional ideas to explore:
- Mix up the shape cut-out and paper patterns based on the season
- Make the pattern the main part and have the more neutral color as the cut-out section. This would make a super cute place to write the gift recipient’s name!
Method B: Washi tape
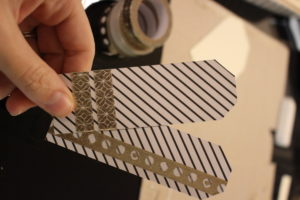
Can we just pause for a moment and embrace the fact that I finally broke down and bought washi tape!? (With a 50% off coupon, of course.) But how fun is that! I reasoned that because I now have a blog, I should have washi tape to spruce up some images. 😉 I went simple so I can use it across the board!
 I paired simple gold washi tape patterns with cute patterned paper and love the result.
Nail your design:
- Avoid pairing too many patterns. Between your paper and washi tape, pick one to be your main pattern. It will serve as a nice addition to its counterpart’s simpler design!
Method C: Stamping
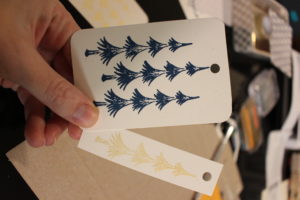
So I have been super excited to try my hand at carving custom stamps, but that is for another time… (Perhaps 2017!?) For now, I went to my local craft store and scoped out some of the cutest Christmas stamps I could find. 🙂
 Try this!
- Stamp out your ideas before diving in. This helped me discover which colors and stamps paired well together.
- Get creative and try unexpected shapes beyond the expected “tag” outline.
Now, these tags may not make the gift in its entirety, but it certainly will be the cherry on top in addition to the next two posts in this mini-series. And if the next two weeks fly by, pair these creative tags with a simple wrapping paper and suddenly your look becomes intentional, which is really all we’re after anyway, isn’t it?
I would love to see what ideas you’ve come up with, so please share your creations on social media using #TheHWP.
Materials I used:
– Stamps
– Ink pads
– Cardstock
– Scrapbooking paper
– Xacto knife
– Glue stick
Which is your favorite way to make a gift tag? Maybe one that isn’t mentioned here? Leave your message in the comments!
